
If you scroll through instagram looking for yoga photos, you’ll see only a handful of yogis posing in Warrior 1. It’s not a particularly flashy pose, or one that people like to show off on a beach or a mountaintop. But this foundational pose can be fairly complex when you break it down into its component parts.
Warrior 1 is a forward facing pose in which the front knee is bent and the back leg is stretched behind. The chest is facing forward, and the arms are reaching up overhead. It is a strength pose, and it requires energy and focus. It may be challenging when you are first learning the pose, but once you get the hang of it, he foundational elements will carry over into many other poses, including warrior 3, pyramid, revolved triangle, and more.
Instructions
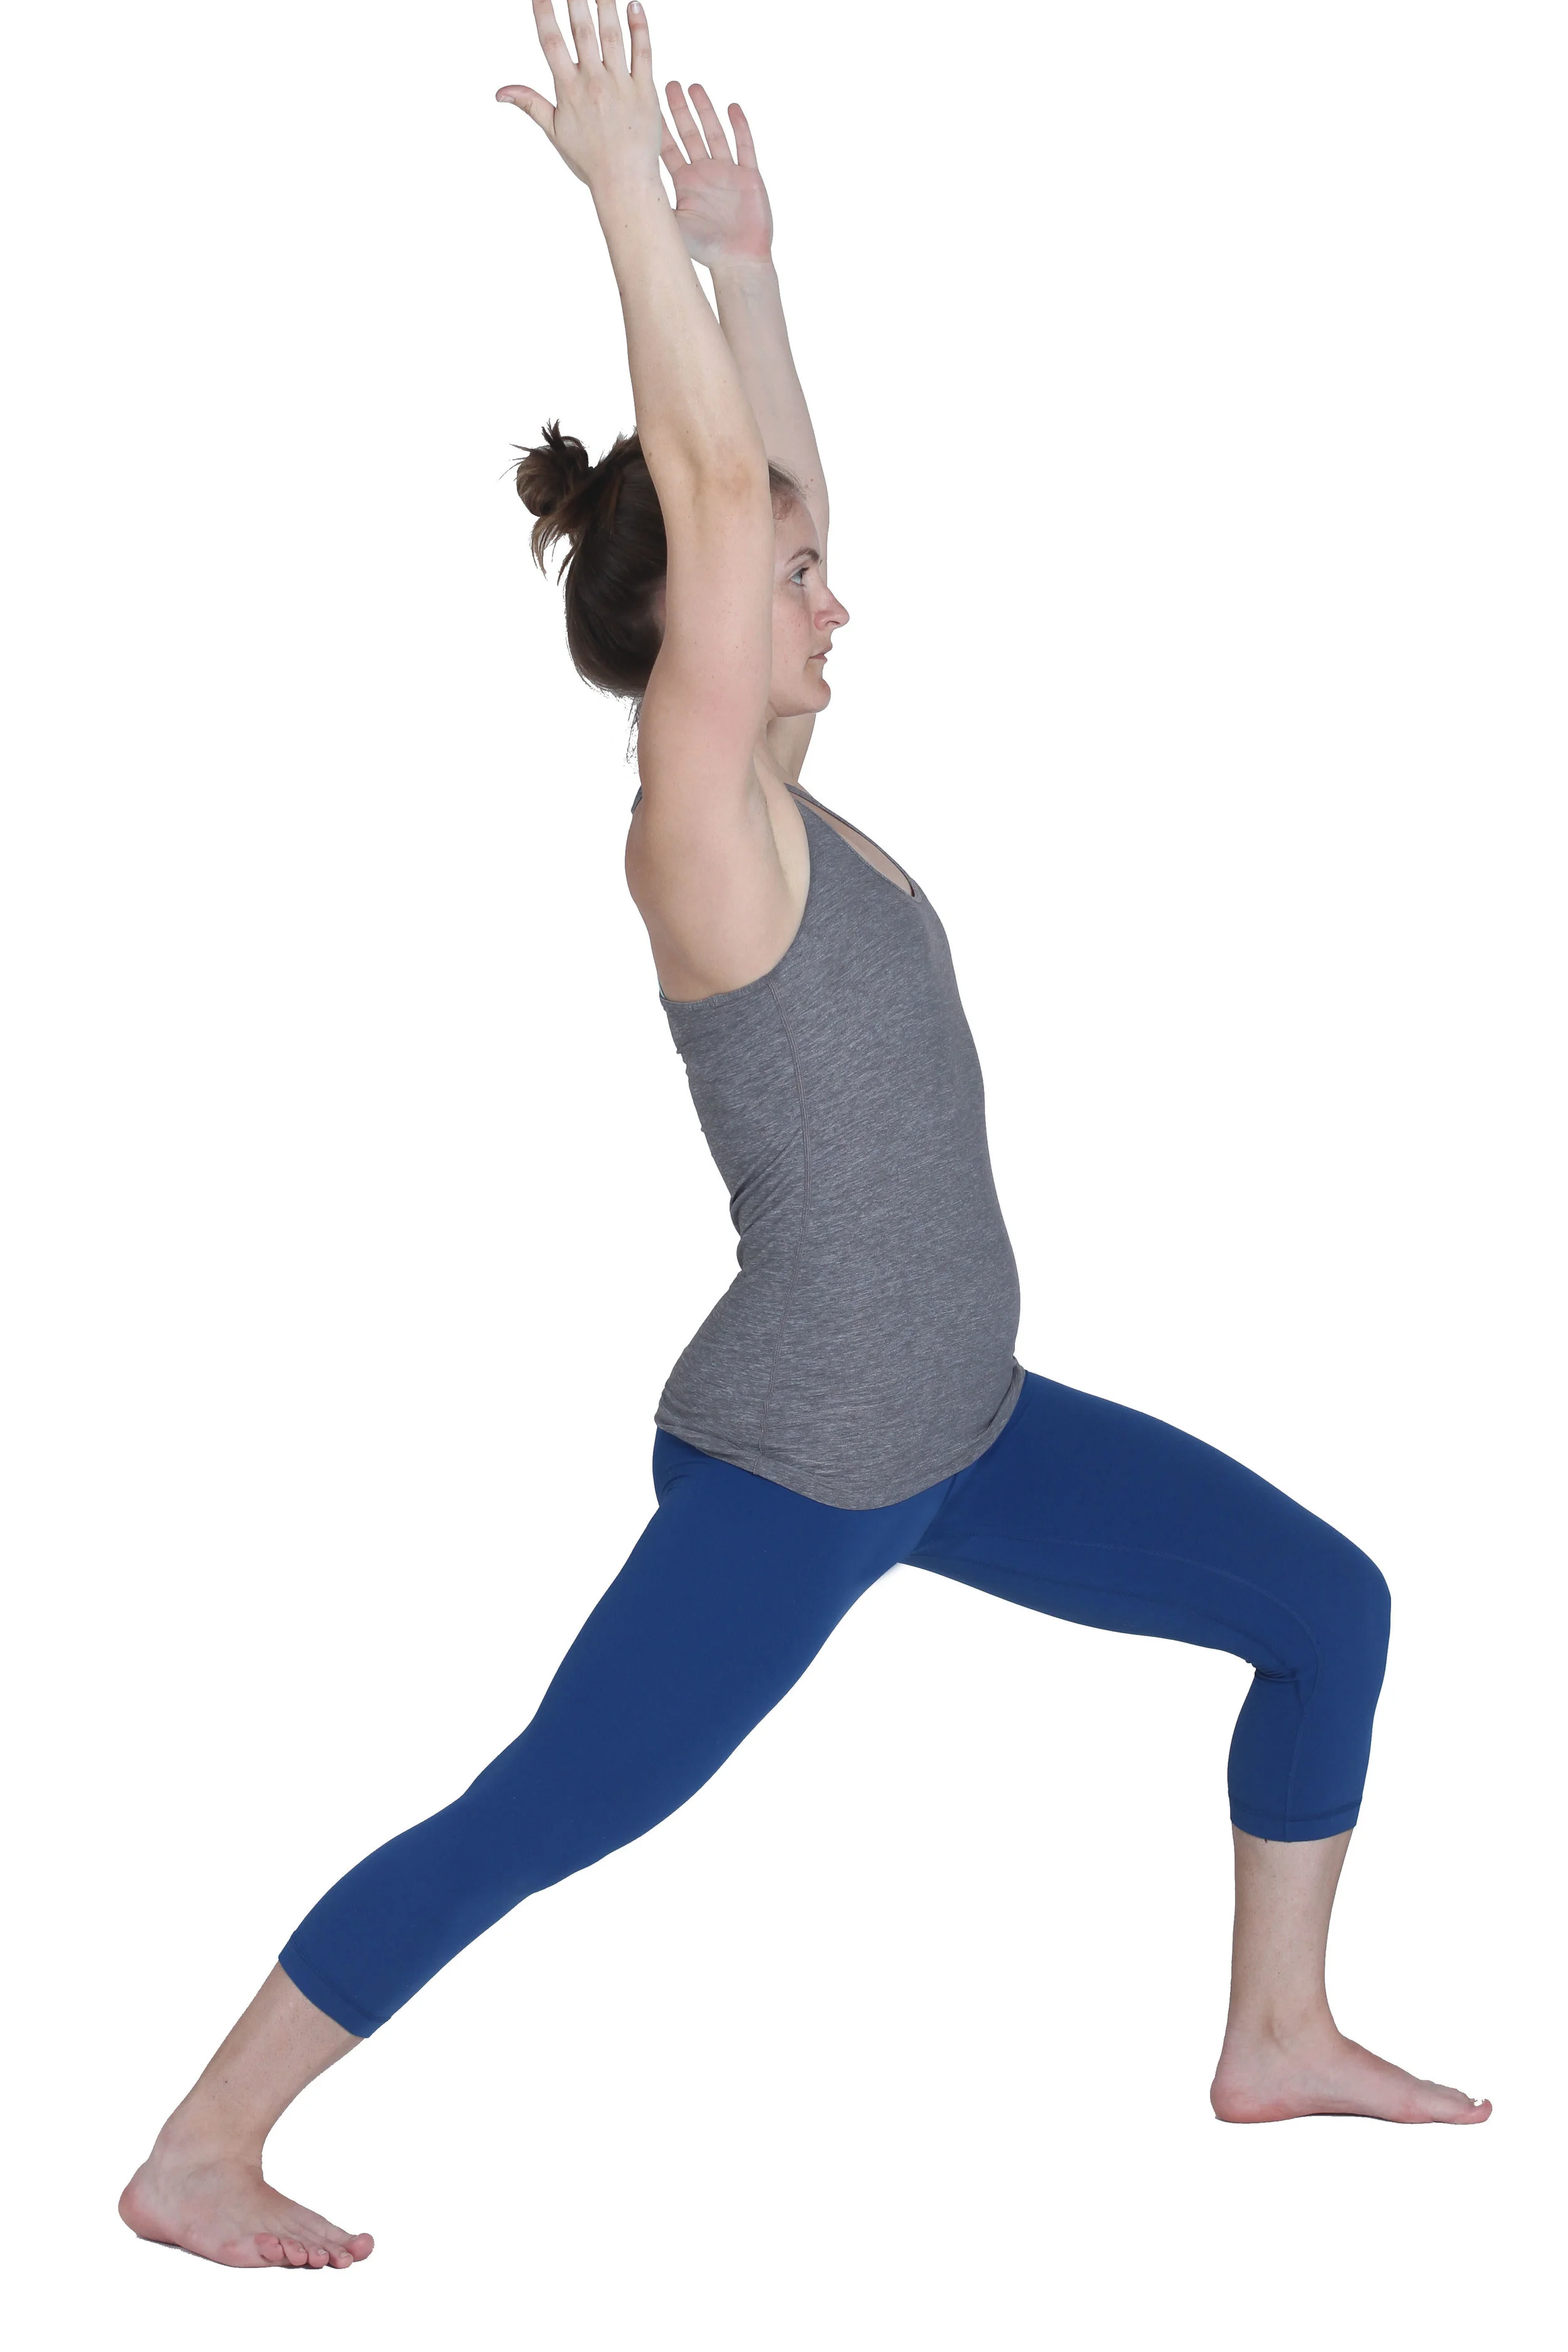
To come into warrior 1, stand in tadasana. Make sure that you feel rooted. Step your left foot to the back of the mat. Most people will step back about 3 feet, maybe a bit more or less depending on your height and flexibility. The back left foot should be positioned flat on the mat with the toes pointing about 45 degrees forward and to the outside. Your feet should be positioned as if you were standing on railroad tracks (as opposed to standing on a tightrope). Don’t try to line up your feet heel to heel - this will cause the hips to be turned more to the side than the front. The left foot is on the left side of the mat, and the right foot is on the right side of the mat.
Your hips will be slightly slanted towards the back. Because of the different positioning of the feet, we shouldn’t expect both sides of the pelvis to be symmetrical. The legs are doing two different things, so the hips will also be doing two different things. The outdated instruction to ‘square the hips’ in warrior 1 pose doesn’t account for this asymmetry. Attempts to square the hips in this pose can cause strain across the sacroiliac joints, as well as put undue pressure on the inner knee joint. Allow your hips to open slightly towards the back leg. Instead of squaring your hips, appreciate the dynamic relationship between the two sides of your pelvis.
Once you have found the best foot positioning, bend your front knee so that the knee is either directly over the ankle, or close to being over the ankle (but not beyond). The deeper the bend at the knee, the more challenging the pose it. If you are just beginning, you can bend it a little less and build up strength. If your stance is too short, your knee may overshoot your ankle. If this is the case, lengthen your stance and try again, making sure your knee isn’t in front of your ankle.
The focus in this pose tends to be on the front leg. The front leg is carrying more of the weight. However, the back leg also plays a crucial role. The back leg should be held straight, in part to protect the knee, but also to provide stability to the pose. The back leg also helps to provide directionality to warrior 1 - sending the energy of the pose forward.
In warrior 1, the chest should be facing forward. Since we are allowing the hips to be open slightly, this means that warrior 1 becomes a little bit of a twist, with rotation at the lower thoracic region of the vertebral column. In order to minimize some of the compression that can come with a twist, even a slight one, make sure to find some length in the vertebral column, and think about lifting the rib cage up away from the pelvis. See if you can breathe some space into the back of the rib cage, avoiding compression in that area.
The traditional arm position is to have both arms reaching up overhead, either with the palms pressing together or simply parallel to each other. If there is tightness through your upper back and shoulders, it might be more difficult to put your hands together. Pressing palms together shouldn’t be a priority. Instead, just make sure your arms are reaching up overhead, and feel the lengthening of the side body and a lift through the crown of the head. Instead of thinking of the shoulders pressing down (to avoid hunching), think instead about lengthening through the spine. That way you’re not forcing the shoulder blades down as the arms and the rest of the torso reach up, creating a situation where your body is at odds with itself!
Alignment
Although warrior 1 might seem like a simple pose, there is actually quite a bit going on. The front hip is flexed, making this pose a forward fold for this leg. The back leg is in extension, making it a backbend for the back leg. The torso is also in slight extension, as well as rotation, making the pose a twist! There is a lot to pay attention to while practicing. I’ll often tell my students that there are four main instructions for warrior 1:
1. Bend your front knee
2. Straighten your back knee
3. Turn your chest forward
4. Breathe
There are, of course, many more refined instructions that can be given. But if you focus on the four listed above, the pose will eventually come together. As it does, you can refine it bit by bit.
Some modifications
If it is difficult for you to keep the arms overhead, it is ok to place hands on your hips, or palms pressing together in front of your chest. You can also extend your arms out to either side. Don’t let tightness of the shoulders or an upper limb injury keep you from this pose!
Try warrior 1 facing the wall, with a block between your shin and the wall. This can help you find the correct positioning of the front leg. It can also make the pose a little easier and take some of the pressure off of the knee.
This pose requires both strength and balance. When you are just learning yoga, you may find it difficult to know what to focus on, because of the many elements that integrate into the pose. It might not feel natural at first. But stay with it, and eventually your body will grow into the pose.